그래, 갈때가지 가보자.
기왕하는 virtual machine이니 최신 경향에 맞춰 설치를 해보자하는 욕심이 생길 수 있다.
nginx(apache 대용), php(fastcgi), mariaDB(mysql 대용)를 설치하고 거기에 워드프레스를 설치하면 속도가 조금더 빨라질 지도 모를 일이다.
1) 이전 글의 1) ~ 5) 까지 절차를 수행한다.
2) nginx를 설치한다. nginx를 설치하려면 repository를 추가하여야 한다. http://wiki.nginx.org/Install을 참고한다. /etc/yum.repos.d 디렉토리로 가서 nginx.repo 파일을 생성하고 아래 내용을 붙여 넣는다.
[root@skemp ~]# cd /etc/yum.repos.d/
[root@skemp yum.repos.d]# cat > nginx.repo
[nginx]
name=nginx repo
baseurl=http://nginx.org/packages/centos/$releasever/$basearch/
gpgcheck=0
enabled=1
그리고 yum으로 nginx를 설치한다.
[root@www ~]# yum install nginx
3) mariaDB를 설치하기 위해서는 https://downloads.mariadb.org/mariadb/repositories/ 에서 각 OS별로 설치법을 참조한다.
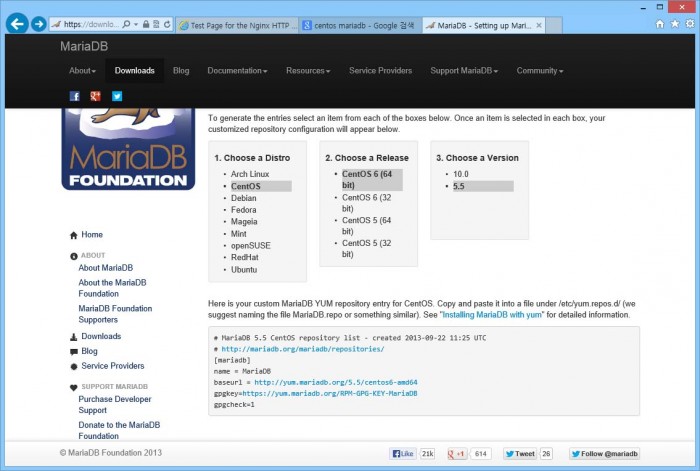
/etc/yum.repos.d/ 로 이동해서 maria.repo 처럼 repository 파일을 생성하고, 아래처럼 repository list를 copy해서 넣는다.
[root@www nginx]# cd /etc/yum.repos.d/
[root@www yum.repos.d]# cat > maria.repo
# MariaDB 5.5 CentOS repository list - created 2013-09-22 11:26 UTC
# http://mariadb.org/mariadb/repositories/
[mariadb]
name = MariaDB
baseurl = http://yum.mariadb.org/5.5/centos6-amd64
gpgkey=https://yum.mariadb.org/RPM-GPG-KEY-MariaDB
gpgcheck=1
4) mariaDB를 설치한다.
[root@www init.d]# yum install MariaDB-server MariaDB-client
5) php(fast cgi)를 설치한다. 기존처럼 php를 설치하고, 추가로 php-fpm을 설치한다. 잠깐 php-mysql이라고? mariaDB라고 하지 않았나?
고갱님, 당황하셨어요? 저희도 mariaDB가 mysql 호환이라 무척 당황했습니다.

[root@www init.d]# yum install php php-mysql php-fpm
6) 이전 글의 8) 내용처럼 해서 방화벽 open을 해준다.
7) 웹서버, mariaDB 서버, php(fast cgi)를 실행시킨다. (mariaDB는 mysql로 다 실행이 됨)
[root@www ~]# service nginx restart
nginx 를 정지 중:                                          [  OK  ]
nginx (을)를 시작 중:                                      [  OK  ]
[root@www ~]# service mysql restart
Shutting down MySQL. SUCCESS!
Starting MySQL.. SUCCESS!
[root@www ~]# service php-fpm restart
php-fpm 를 정지 중:                                        [  OK  ]
php-fpm (을)를 시작 중:                                    [  OK  ]
또한, 부팅시 자동으로 실행되도록 chkconfig로 등록한다.
[root@www ~]# chkconfig | grep nginx
nginx           0:해제  1:해제  2:해제  3:해제  4:해제  5:해제  6:해제
[root@www ~]# chkconfig | grep mysql
mysql           0:해제  1:해제  2:해제  3:해제  4:해제  5:해제  6:해제
[root@www ~]# chkconfig | grep php-fpm
php-fpm         0:해제  1:해제  2:해제  3:해제  4:해제  5:해제  6:해제

[root@www ~]# chkconfig | grep nginx
nginx           0:해제  1:해제  2:해제  3:해제  4:해제  5:해제  6:해제
[root@www ~]# chkconfig | grep mysql
mysql           0:해제  1:해제  2:활성  3:활성  4:활성  5:활성  6:해제
[root@www ~]# chkconfig | grep php-fpm
php-fpm         0:해제  1:해제  2:해제  3:해제  4:해제  5:해제  6:해제
[root@www ~]# chkconfig nginx on
[root@www ~]# chkconfig mysql on
[root@www ~]# chkconfig php-fpm on
[root@www ~]# chkconfig | grep nginx
nginx           0:해제  1:해제  2:활성  3:활성  4:활성  5:활성  6:해제
[root@www ~]# chkconfig | grep mysql
mysql           0:해제  1:해제  2:활성  3:활성  4:활성  5:활성  6:해제
[root@www ~]# chkconfig | grep php-fpm
php-fpm         0:해제  1:해제  2:활성  3:활성  4:활성  5:활성  6:해제
8) 이전 글의 10)의 절차를 수행한다.
9) nginx의 configuration을 수정해야한다. /etc/nginx/conf.d 디렉토리의 default.conf를 수정한다.
[root@www ~]# cd /etc/nginx/conf.d/
[root@www conf.d]# vi default.conf
아래 주황색 표시는 nginx에서 php를 사용하기 위해서 추가 혹은 변경해야 되는 내용이다. 그리고, 파란색 내용은 워드프레스에서 rewrite(고유주소) 기능을 사용하기 위해 추가해야 되는 내용이다. 워드프레스를 웹의 root directory에 설치하는 경우는 location / 안의 파란색 내용을, 서브디렉토리에 설치하는 경우는 location /wordpress 이하 내용을 참조하여 수정하면 된다.(wordpress 대신 설치한 서브디렉토리 이름으로 변경)
#
# The default server
#
server {
    listen       80 default_server;
    server_name  _;

    #charset koi8-r;

    #access_log  logs/host.access.log  main;

    location / {
        root   /usr/share/nginx/html;
        index  index.html index.htm index.php;

        # rewrite.  root directory에 워드프레스를 설치한 경우
        try_files $uri $uri/ /index.php?q=$uri&$args;
    }

    # rewrite. 서브디렉토리(/wordpress)에 워드프레스를 설치한 경우
    location /wordpress/ {
        index  index.html index.htm index.php;
        try_files $uri $uri/ /wordpress/index.php?q=$uri&$args;
    }
    error_page  404              /404.html;
    location = /404.html {
        root   /usr/share/nginx/html;
    }

    # redirect server error pages to the static page /50x.html
    #
    error_page   500 502 503 504  /50x.html;
    location = /50x.html {
        root   /usr/share/nginx/html;
    }

    # proxy the PHP scripts to Apache listening on 127.0.0.1:80
    #
    #location ~ \.php$ {
    #    proxy_pass   http://127.0.0.1;
    #}

    # pass the PHP scripts to FastCGI server listening on 127.0.0.1:9000
    #
    location ~ \.php$ {
        root           html;
        fastcgi_pass   127.0.0.1:9000;
        fastcgi_index  index.php;
        fastcgi_param  SCRIPT_FILENAME  /usr/share/nginx/html$fastcgi_script_name;
        include        fastcgi_params;
    }
    # deny access to .htaccess files, if Apache's document root
    # concurs with nginx's one
    #
    #location ~ /\.ht {
    #    deny  all;
    #}
}
10) 이전 글의 13) 이하의 작업을 하면 된다.
변경된 점은 웹 초기 디렉토리가 /usr/share/nginx/html 이라는 것과, 계정 및 그룹 명이 apache가 아닌 nginx라는 점이다.
[root@www ~]# cd /usr/share/nginx/html/
[root@www html]#
[root@www html]# chown -R nginx wordpress/
[root@www html]# chgrp -R nginx wordpress/
또한 이상하게 초기 설치 시 wp-config.php를 기록하지 못하는데, 이는 설치 시 wp-config.php 내용을 긁어서 해당 디렉토리에 파일을 만들던지 잠시만 wordpress디렉토리의 permission을 777 로 변경시키면 된다. 설치 이후에는 다시 permission을 755로 변경시키자.
[root@www html]# chmod 777 wordpress/
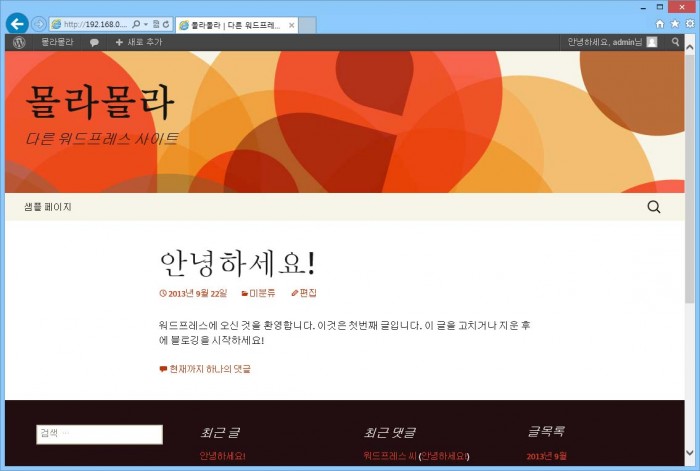
11) 글이 잘써지나 확인했는데, 잘되는 군요.